Wednesday, December 29, 2010

New Year's Good Luck Menu

Here it is, a few days out from New Year's 2011 and we are busy finalizing a New Year's Eve menu featuring a whirlwind, round the world gathering of tradition foods to bring good luck in the New Year. Pretty interesting, so we thought we'd share.
Here's a partial list of the food and dishes that people feel will hearken a Prosperous New Year!

Lentils and Black Eyed Peas
Legumes like Lentils have a long standing connection symbolizing wealth due to their round shape which resemble coins it is said. Also, they swell as they cook symbolizing a swelling of wealth for those consuming them.
Similarly Black Eyed Peas symbolize coins, but also have a good luck connection apparently due to folk stories from the Civil War when the town of Vicksburg, Mississippi ran out of most food and survived on black eyed peas. Good luck indeed!

Pork
Pigs root forward with their noses, symbolizing progress and therefore are another New Year's food. Chickens on the other hand scratch backward, and should never be served on New Year's.
Pork's connection to fat and richness is another reason for it's place on the New Year's table.


Greens
As in folding money... and hence it's connection to the good luck meal. It's said the more greens your eat on New Year's the greater fortune you can expect in the coming year. In Germany it is consumed as Sauerkraut, in the American South, collards are the greens of choice.


Grapes
In Spain and many of it's former colonies, it's tradition to swallow twelve grapes on Midnight on New Year's Eve to bring luck to the New Year. There's two thing's we love about this tradition.
One - The level of sweetness in each grape is said to predict the sweetness (or lack thereof) in the corresponding month. Fourth grape a little sour? Watch out for April...
Two - The entire tradition of swallowing grapes is purported to have been started by the Alicante region of vineyards to handle an over-abundant harvest!

Fish
Cod specifically. The abundance and nourishment that Salt Cod brought to so many remote areas of the globe, before refrigeration of quick transportation, have insured it's legacy as a symbol of prosperity.


Noodles
The longer the better! Noodles have long symbolized longevity and New Year's is the perfect time to aspire to a long health and successful life!
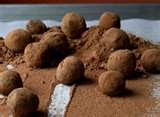
Cakes
Cakes or cookies either round or ring shaped have a long history of being served at New Year's to bring longevity, symbolized by the continuity of the circle.

So choose your menu with care, but whatever you find on the table, all of us at DM Cuisine wish you a Happy, Healthy and Prosperous New Year!

Thursday, December 23, 2010

Sugar Spiced Nuts


There are many dishes we serve at DM Cuisine that can easily qualify as "Signature Dishes". Certainly the Caramel Glazed Baked Brie is one, Smoked Salmon in Dill Crepes another.... Then there's the Chocolate Budino Cake, Truffled Wild Mushroom Lasagna, and of course Le Croquembouche!

And there aren't many parties which are not graced with a bowl or three of Spiced Mixed Nuts. The version we serve most often is a mix of sugar, salt and spices that verge on addictive. True story, we have one client who has forbidden then to be served in his company because he can't control himself around DM's Sugar Spiced Nuts!

So here's the recipe for you to make at home. We can take no responsibility for uncontrolled consumption.

Sugar Spiced Nuts

1 egg white
1 Tablespoon Water
1 pound raw nuts (whole almonds, pecan or walnut halves (or unsalted mixed nuts)
2/3 cup granulated sugar
1 teaspoon salt
2 teaspoon ground cinnamon
3/4 teaspoon ground ginger
3/4 teaspoon ground allspice
1/2 teaspoon ground coriander

Preheat oven to 250 degrees.
Beat egg white with water until frothy. Combine with nuts and let drain in a sieve for 2 minutes.
Combine remaining ingredients in a bowl. Put nuts and sugar-spice mix in a large bag and shake vigorously to coat nuts well. Scatter on a large baking sheet and bake for 15 minutes. Remove from oven and toss nuts with a spatula. Lower oven temperature to 225 degrees and return nuts to oven. Bake one hour longer, tossing the nuts every 20 minutes or so,until nuts are crisp. Cool and store in an air tight container or freeze.

Thursday, December 16, 2010

Persimmon Pudding


Catering during the holidays brings some particular responsibilities. It's a time for tradition, and everyone seems to have their own take on which traditions most need to be followed. Christmas Ham? The Feast of 7 Fishes? Latkes? Buche de Noel? Hallacas? Goose???

Sometimes a client will ask us to prepare an old family recipe. This can often be a recipe for disaster as one never knows how much of the recipe Aunt Jimmy had in her head and how much really made it to the paper... But several years ago we were handed this recipe for Persimmon Pudding with the caveat that "Christmas just wouldn't be Christmas without it". It has since become one of our favorites. It's simple enough to tweak as you wish. Maybe some orange zest, this year with added cinnamon and nutmeg, maybe a generous douse of brandy set afire as it comes to the table.

If you haven't cooked with persimmons very much, here's some info for you. There are two basic types on the market. Hachiya and Fuyu. The Hachiya are slightly elongated and the bottom comes to a tip. These needs to be squishy soft with a slightly translucent skin in order to be edible. Anything less than mush is inedible and will provide more astringent pucker than any person could handle. The Fuyu variety look like an orange tomato and are best when firm to the touch. For this recipe, use the Hachiya variety. You can make the persimmon pulp by peeling and seeding the persimmon and pureeing it in a blender or processor.
Here's the basic recipe:

Persimmon Pudding

butter and flour for lining mold
1 cup flour
2 teaspoons baking powder
1 1/2 teaspoons baking powder
1/4 teaspoon salt
1 cup Hachiya persimmon pulp, overripe
1 Tablespoon unsalted butter, room temperature
1 cup granulated sugar
1 teaspoon vanilla extract
1/2 cup whole milk
2/3 cup dried fruit (we suggest dried tart cherries and raisins, 1/3 cup each)

Lightly coat the interior of a lidded mold (or heatproof bowl) with butter and flour. Set aside.

Sift together dry ingredients and set aside. Mix together persimmon pulp, butter and sugar until blended. Add vanilla. Alternately mix the dry ingredients and milk into the persimmon mix. Stir in dried fruit.

Pour the pudding mix into the prepared mold, filling it 3/4 full . Attach the lid and tie in place with string. (If using a bowl, cover the bowl with parchment paper and then cover with a clean towel and enclose in aluminum foil.)
Place mold in a large steamer, or on a raised rack in the pan, add an inch or so of boiling water and steam over low heat for 5 hours. Keep an eye on the pot and add more hot water as needed to keep a steady supply of steam.

Remove from steamer and let cool completely. Unmold carefully and serve with spiced whipped cream.

Friday, December 10, 2010

Late for Latkes


Well Hanukkah 2010 has passed and we are clearly late with our Latke post. But we feel they are just way to delicious to let that stop us, so here's to all things fried, especially potato pancakes.


Lots of cultures have some form of a potato pancake. Many of them are tasty too. But the classic Jewish potato latke, with a generous dollop of sour cream and a garnish of chunky applesauce is the stuff of many a Hanukkah craving and a good many goyisha daydreams as well.

For this you want to stay simple: potatoes, onion, egg and a dash of flour. And don't skimp on the oil when you fry them. The crispy crust is the key to their soul warming goodness.


Potato Latkes


You'll want to make sure you don't crowd the skillet. Fry these latkes in batches. Keep them warm in a low oven, single layer, on a paper towel lined baking sheet. unless of course you've got an appreciative crowd around the stove, eating them as quickly as you can make them.

This should make 12 - 14 latkes, 1 1/2 - 2 inches diameter


1 1/2 pounds Idaho russet potatoes, peeled
1 large onion, peeled

1/4 cup + 2 tablespoons all-purpose flour
1/2 teaspoon kosher salt
1/4 teaspoon freshly ground black pepper
1 large egg, whisked in a small bowl
vegetable oil, approximately 1/2 cup, divided


Lay a clean kitchen towel on your work surface. Using the large holes of a box grater, grate the potatoes onto the kitchen towel. Then grate the onion onto the shredded potatoes. When finished, gather up the ends of the towel and tighten the towel to enclose the shredded potato mix in a "ball". Over the sink, squeeze the towel with the potato mix, until all the liquid has dripped from the mix. Transfer the potato mix into a large bowl. Add 1/4 cup flour, egg, salt and pepper, and combine well. Squeeze the mixture in your hand. If it holds together fairly well, you are good to go. If it is too loose to hold together add another Tablespoon or 2 of flour, then proceed.

Heat a large skillet over medium-high heat. Add about 1/3 cup oil to pan, and swirl to coat. Spoon 1/4 cup potato mixture loosely into a dry measuring cup. Pour mixture into pan, and flatten slightly. Repeat until pan is full but not crowded. Probably about 6 latkes. Sauté a few minutes on each side until golden brown. Remove latkes from pan, and keep warm. Repeat procedure with the remaining oil and potato mixture.


One of our former chefs David Bonom, now a big time food writer, has an inspiring article all about latkes in the December 2010 Cooking Light magazine that we are recommending highly. He puts fresh thyme in his latkes which I think sounds like the perfect amount of tinkering with a classic. Moving further afield he also includes recipes for a Southwestern inspired and jalapeno spike latke and a Curried Butternut Squash version that I'd like to garnish with an Indian Raita. Check them out.


Once you have the classic latke under your belt, feel free to substitute a portion of the potato with carrots, yams, celery root, parsnips, any starchy vegetable will do. Or you can try adding chopped mushroom, shredded spinach or fresh herbs for extra pizazz.

Friday, December 3, 2010

Ginger, Vanilla and Pine Nut Biscotti


Now that we've satisfied all those Thanksgiving cravings of stuffing and pumpkin and such, our yearnings are now focusing on Holiday Cookies. While DM always supplies a few sweet bites at the end of our catered meals, and even our cocktail parties from time to time; it's also a tradition to toss some specific holiday sweets into the mix during December. Hand Decorated Sugar Cookies, Miniature Gingerbread Men, Chocolate Peppermint Stick Marshmallows, and those Pecan Snowballs covered with powdered sugar. We also always include some biscotti. Especially after dinner, this not-too-sweet cookie is a perfect garnish to a meal. Try one dipped into the last bit of wine in your glass.


Ginger, Vanilla and Pine Nut Biscotti
1 3/4 cup All Purpose Flour
1/2 teaspoon Baking Powder
1/4 teaspoon Salt
1 teaspoon Ground Ginger
4 Tablespoons Unsalted Butter, very cold and diced 1/4" pieces
3/4 cup pine nuts
1 cup Crystalized Ginger, roughly chopped
2 large eggs
2/3 cup Granulated Sugar
1/3 whole vanilla bean, split and scraped

Preheat oven to 350*
Sift together the flour, baking powder, salt and ground ginger. Put flour mixture into the bowl of a food processor and add cold butter. Pulse until mixture resembles a coarse meal. Transfer to a large mixing bowl and add pine nuts and crystalized ginger.
Return work bowl to the processor and add eggs, sugar and vanilla bean. Process briefly until very well mixed. Add egg mixture to the flour mixture and work it together by hand until a dough forms. Divide in half and roll into logs
Place parchment paper on a baking sheet. Form each log of dough into a rectangle on the parchment approximately 13" X 2 1/2" x 3/4".
Bake for 25 - 30 minutes. Lower oven temperature to 250*. Remove baking sheet from the oven and cool for five minutes. Slice the biscotti crosswise about 1/4" thick. Rearrange biscotti, laying flat, on the baking sheet. Return to oven and bake until cookies are dry, about 15 minutes. Remove from oven and let cool completely. Store in an air tight container.
Makes at least 5 dozen.

Friday, November 19, 2010

Jello Shots for Thanksgiving

We saw these recipes on Saveur.com, one of our favorite websites for inspiration, motivation and up to date, "must know" developments in the food world, and thought "WOW", brilliant concept! So we're passing them on to you in hopes that your Thanksgiving might be oh so much better with a little jiggle.

Michelle Palm, from the blog Jelly Shot Test Kitchen (rough gig!) has developed three wiggly cocktails that are just sophisticated enough to counter-balance the giggle factor. They're also perfectly seasonal and totally in synch with all the other flavors of the holiday meal: The Pear Sour has an aromatic balance of lemon, pear liqueur, and gin, with a dash of Angostura bitters; the Bourbon Smash is a mix of fresh raspberries and mint, with just a touch of bourbon, and Apple Pie delivers as promised with apple juice, Apfelkorn, and Tuaca, a creamsicle-flavored liqueur.


Pear Sour

1/4 cup frozen lemonade
concentrate, thawed
and strained to remove
solids
1/4 cup water
3 envelopes Knox gelatin
1/2 cup Lillet blonde
1/2 cup gin
1/2 cup pear liqueur (we use Belle
de Brillet)
3 dashes Angostura bitters
2 tsp. agave nectar or simple syrup,
if desired
Fresh pear, for garnish (optional)

Recommended pan: molds or 1-lb. loaf pan (approximately 8" x 4")

1. Pour lemonade concentrate and water into a small saucepan and sprinkle with the gelatin. Allow the gelatin to soak for a minute or two. Heat over very low heat, stirring constantly, until gelatin is dissolved, about 5 minutes. Mixture will initially be very thick. Remove from heat.

2. Stir in the Lillet, gin, pear liqueur, and bitters. Taste; add the agave nectar/simple syrup if desired.

3. Pour mixture into pan or molds and refrigerate until fully set, several hours or overnight.

4. To serve, cut into desired shapes or unmold. Garnish with slivers of fresh pear, if you like.

MAKES ABOUT 15 JELLY SHOTS


Bourbon Smash

1 6-oz. package fresh
raspberries, plus
additional for garnish
(optional)
3 large sprigs fresh mint
(about 25 mint leaves)
2/3 cup bourbon
2/3 cup cranberry juice cocktail
1/3 cup limeade concentrate, thawed
and strained to remove solids
1/3 cup water
3 envelopes Knox gelatin
2 tsp. agave nectar or simple syrup,
if desired

Recommended pan: molds or 1-lb. loaf pan (approximately 8" x 4")
Implements: cocktail muddler, bowls, fine mesh strainer

1. Muddle raspberries and mint leaves in small bowl. Stir in bourbon and set aside.

2. Pour cranberry juice, limeade concentrate, and water into a small saucepan and sprinkle with the gelatin. Allow the gelatin to soak for a minute or two. Heat over very low heat, stirring constantly, until gelatin is dissolved, about 5 minutes. Remove from heat.

3. Strain the raspberry–bourbon mixture, making sure to press out all the liquid (you should have about a cup of liquid). Stir into the gelatin mixture. Taste; add the agave nectar/simple syrup if desired.

4. Pour mixture into pan or molds and refrigerate until fully set, several hours or overnight.

5. To serve, cut into desired shapes or unmold. Garnish with slivers of fresh raspberry and mint, if you like.

MAKES ABOUT 15 JELLY SHOTS


Apple Pie Jelly Shot

1 cup unsweetened apple
juice
3 envelopes Knox gelatin
3/4 cup Tuaca liqueur
1/4 cup Berentzen
Apfel Korn liqueur
(or apple schnapps)

Recommended pan: molds or 1-lb. loaf pan (approximately 8" x 4")

1. Pour apple juice into a small saucepan and sprinkle with the gelatin. Allow the gelatin to soak for a minute or two. Heat over very low heat, stirring constantly, until gelatin is dissolved, about 5 minutes. Mixture will initially be very thick. Remove from heat.

2. Stir in the Tuaca and Apfel Korn.

3. Pour mixture into pan or molds and refrigerate until fully set, several hours or overnight.

4. To serve, cut into desired shapes or unmold.

MAKES ABOUT 15 JELLY SHOTS


All photos by Michelle Palm

Friday, November 12, 2010

Stuffin' Time


One of the cornerstones of "poverty cuisine" is the stack of recipes using left over bread. There's stuffing, bread pudding, french toast, croutons, stratas, pasta with bread crumbs, soups and on and on. Sadly with today's low carb sensibilities, it's hard enough to find a fresh crumb, let alone any stale bread. Of all of these carbohydrate motherloads, stuffing is the hands down winner this time of year. And with Thanksgiving approaching, we've already begun to think about sourcing out our stash of bread.

Please take the time to cut up your own bread cubes and dry them out. It's maybe a little more expensive than buying the pre-packaged bread cubes, but it's so worth the little bit of time and money invested to make it yourself. Plus there's all the possibility for variations that Pepperidge Farm will deny you!

With the wide variety of breads available it's worthwhile to think outside of the box. For example one combination we love is sliced sourdough and 7 grain. We mix about 65% sourdough with 35% 7 grain and love the combination of tang and earthiness. Rye bread is another interesting possibility, I remember one event where we made a rye, mushroom and sauerkraut stuffing to serve along roast pork for an Austrian dinner. There's a delicious rosemary bread in our market that could really make a killer stuffing too. Pretty much any great bread will add the character you want. The only bread I'd stay away from is pumpernickel, but even that, used judiciously, well, might be interesting. especially if tempered by a big bunch of white bread or maybe challah. We'd advise to always include a generous portion of a simple white or whole wheat bread in the mix to prevent the stuffing from becoming more leaden that necessary.

Cornbread is another favorite stuffing and is also much enhanced by prepping the cornbread cubes yourself. Even more so if you can bake the corn bread yourself! If your recipe is on the sweet side, consider halving the sugar. It usually makes a tastier stuffing.

So you've got your bread, what next? If you're not using sliced bread, slice it about 1/2" -3/4" thick. Leave the crust on, it adds texture. Stack the slices and cut into cubes, again 1/2" - 3/4" big. Scatter them on sheet pans and let them dry out for at least 3 days, until tough and completely dry. They might never become as hard as store bought, but you want to make sure they are dried out. If there's not enough counter space you can dry them out in a large bowl or pot, but you'll need to toss them several times a day. It might take an extra day to dry them out, depending on volume.

So your bread cubes are ready, what's next? Just follow your family recipe, or your instincts, your inspiration, or some combination therein. The basic procedure is to saute vegetables (onions, celery, garlic, carrots, etc) in a very generous amount of oil, butter or chicken fat. Add herbs and other seasonings. Add to the bread cubes and combine well. If you are using sausage, ham, or other meats/shellfish, cook it briefly and add to the bread cubes as well, mixing completely. Moisten the stuffing now with a generous amount of stock (veg or poultry usually) and mix. Keep adding stock until the cubes are saturated but not falling apart. Place in a well buttered casserole and bake until cooked through and crispy on top. Alternately use it to stuff inside your bird, remembering to leave a little room for the stuffing to expand.

And just in case your imagination is failing you.... here are some flavor combinations we've had success with:

Sourdough, 7 Grain, Sausage, Mushroom, Carrot and Celery
Cornbread, Leeks, Pecans and Dried Cranberries
Herb Bread, Olives, Red Onions, Swiss Chard and Raisins
Challah, Wild Rice, Apples, Red Peppers, and Walnuts
Raisin Bread, Baguette, Prosciutto, Celery Root, Parsnip, Onion, Herbs
Corn Bread, Chorizo, Red and Yellow Peppers, Onions
Foccacia, Rye, Pancetta, Leeks, Fennel, Porcini, Chestnuts

Tuesday, October 26, 2010

Autumn's Bounty Aflame


While we are up to our ears in a sea of the yellows, oranges, reds and greens of the season, it's fun to post some ideas that aren't about cooking. We are in the thick of squash season and they are so beautiful we can't help but pile them up on the counter top, bringing in a tsunami of color to the otherwise bland kitchen.

This got us thinking about other possibilities for decorating with this "end of season bounty". Happily many of these colorful squash and pumpkins are so hard shelled they have a long shell life when unrefrigerated. Additionally there are many that have no real purpose beyond decoration.


The first idea we had was to use them as candleholders. Smaller delicata or acorn squash can hold either a single short taper or a tea candle. Make sure the squash sits securely level and then using an apple corer, remove a small plug of the squash where a candle can fit snugly. Use a biscuit cutter if trying to carve out space for a tea candle. Consider laying a crookneck or large butternut squash on it's side and create a "natural" candelabra with 3 or 5 tapers grouped over the gourd.


Another idea we had was to slice open a small sweet dumpling or acorn squash, add some water and make small posey arrangements of fall dahlias. Carefully hollow out the squash and fill halfway with water. Arrange the flowers in a tight grouping and the squash tops look great leaning against the arrangement. Group several of them together, using a mix of varieties, as a centerpiece.

And then finally we are thinking that the very small mini pumpkins and squash could look great atop a napkin on a charger at a more formal autumn dinner. It would be easy to attach a place card or even a menu card if you wanted. There's only a few months to take advantage of these gorgous squash and gourds, so have fun.

Friday, October 8, 2010

Brussels Sprouts


Sometimes it seems we must be on a One Caterer Campaign to repair the damage done to the reputation of Brussels Sprouts. We're not sure how and when they came to be remembered as heavy, bitter and sulphurous, but we ARE sure they can be light, fresh, bright and delicious. At least that's what we hear from surprised clients when they come back for seconds.

Brussels Sprouts are some of the craziest looking vegetables around when they are growing in the garden. It's no stretch to imagine them in Fred and Wilma's Bedrock garden. Pretty prehistoric looking stuff.

But we're all more accustomed to seeing them cut from the stalk and packed in little cardboard cups, or loose in the farmer's market. Look for small to medium sprouts with tight heads of vibrant green. Any yellowing means they are not fresh. Whenever possible choose brussles sprouts that are all of similar size. Overcooking is the prime enemy of brussles sprouts so you want evenly sized sprouts that will cook at the same rate.

Part of DM Cuisine's success at winning over former detesters is by thinking of new ways to approach cooking and serving Brussels Sprouts. Our preferred methods are Roasting, Shredding and Separating.

Roasted Brussles Sprouts
This couldn't be easier. Trim stem ends and any discolored or loose leaves from the sprouts. If larger than 1 1/2 inches cut them in half or even quarters. What's important is that all pieces are roughly the same size. You may need to leave tiny ones whole, medium ones cut in half and large ones quartered. Preheat oven to 425*.
Place brussels sprouts into a large bowl, drizzle lightly with olive oil or herb infused oil. Season well with salt & pepper. Place sprouts on a baking sheet allowing plenty of room around the pieces. Don't crowd them or they will steam instead of roasting. Place baking sheet in oven and cook until JUST tender. This will vary depending on your oven and how small you cut the sprouts. Check them after 6 minutes. They should be tender to the bite but not soft.
Serve warm, just as they are.

Alternate Version with Pancetta
Brussels Sprouts have a natural affinity for bacon. Even more so with pancetta in our opinion. Pancetta is an unsmoked Italian bacon. We like to cut large pieces of pancetta about 1/4" x 1" and saute them until browned and almost crisp. Drain the pancetta and reserve the fat.
Proceed with roasting the brussels sprouts as described above, but combine a few spoonfuls of this pancetta fat with the olive oil needed to roast the brussles sprouts. When the sprouts come out of the oven, toss them with the pancetta. Enjoy and don't mention to your cardiologist.

Sauteed Shredded Brussels Sprouts
What you'll need:
Brussles sprouts, shallots, chopped toasted walnuts, olive oil, walnut oil.
Using a mandolin or V-Slicer, hold the brussels sprouts by the stem end and finely shred (carefully). Obviously this is a great use for large brussels sprouts the brussels sprouts. Stop as you get to the stem and discard. Once the sprouts are shredded set aside. Finely chop a few shallots.
Warm a saute pan over medium heat. Add a small amount of olive oil, the shallots, and cook a few minutes until translucent. Add shredded brussels sprout and toss to coat lightly with shallots. Saute briefly until the shredded sprouts just begin to wilt. Season well with salt & pepper. Add a few spoonfuls of walnut oil and the toasted walnuts. Toss well and serve immediately.

Stir Fried Brussels Sprouts Leaves
We usually make this presentation with an added vegetable (corn, green beans, carrots & parsnips) partially because it's a bit labor intensive to prep the sprouts. If you decide to do this, just stir fry the other vegetables however you wish and add the brussels sprouts leaves in for the last minute or two of cooking.

Trim the stem end of the brussels sprouts and carefully separate the leaves individually. It's slow going, but worth it, at least for a small group!
When you get to the tiny center, stop and use those for another recipe. Once the sprouts are prepped set them aside in a bowl.
Slice a small red onion into thin slivers. Warm olive oil in a saute pan over medium high heat. Cook onion slivers until tender, just a few minutes. Add brussels sprouts leaves and salt & pepper. Stir fry until the leaves wilt. Don't worry if some leaves get e little charred edge. It adds great character.
Serve immediately.

Thursday, September 30, 2010

Chocolate Ganache


For many of our clientele, if it's not chocolate, it's not dessert. Perhaps its the same for you. If that's the case, here is a recipe that can come to your rescue in mere moments. One recipe can provide for at least 5 immediately gratified cravings of any self respecting chocoholic. A deep chocolate glaze, a rich tart filling, a creamy cake or cookie filling, a fluffy frosting or a soul soothing truffle, all created form the alchemy of Chocolate & Cream. Chocolate Ganache

Ganache is a French term referring to a smooth mixture of chocolate and cream. No one knows when ganache was invented exactly, but it seems to have been created around 1850. Some say it originated in Switzerland where it was used as a base for truffles. Others say it was invented in Paris at the Patisserie Siravdin. No matter, the important fact is that it WAS invented, and has been celebrated ever since.

Bittersweet, Semi-Sweet, Milk or White chocolate can be used though both milk and white chocolates tend to be less stable mixtures and require a certain amount of finesse. The ganache mixture can also be flavored with herbs, spices, alcohol or extracts. It's very common to stir in a Tablespoon of Cognac, Rum or Liqueur. Also a teaspoon of vanilla or smaller amount of extract wouldn't be amiss. If you want to be a little more adventurous, you can gently steep the heavy cream with cinnamon sticks, star anise, lemon peel or even dried chile, letting the cream warm until the flavor has infused it. Just remember to strain the cream as you add it to the chocolate.


Chef Daniel's Ganache

2 pounds bittersweet chocolate (72%) - room temperature
2 cups heavy cream
Optional flavorings as desired. See above.

Rough chop the chocolate and put into a bowl. Warm the heavy cream in a saucepan until steam begins to rise from the cream's surface. Pour the heavy cream over the chopped chocolate and allow to sit for 30 seconds to 1 minute. Gently stir the mixture until completely smooth. Add flavorings as desired.

Glazing:
Allow the mixture to cool very slightly. Brush your cake free of any crumbs and set on a cake rack over a sheet pan. Slowly pour a thin stream of the ganache over the cake starting in the middle. As you pour the ganache, move in a spiral form, making sure the cake is completely covered. Allow the excess glaze to run off the sides of the cake and onto the sheet pan. Let cool completely. If you need to refrigerate, the shine on the glaze will dull slightly.

Tart Filling:
Lay pre-purchased mini tart shells on a sheet pan. Pour the warm ganache into the shell and allow to cool until set. Delicious as is, but no one would yell if you added a dot of whipped cream...

Cookie/Cake Filling:
Pour ganache into a bowl while still warm. Whisk the mixture until it stiffens to a spreadable consistency. Spread on the bottoms of cookies, meringues, shortbread, etc and add another cookie to form chocolate sandwich cookies. It can also be used as a cake filling at this stage.

Frosting:
Pour the ganache into a mixing bowl and whip with an electric mixer until it lightens in color as air is mixed in. At this point it can be applied with a spatula or piped through a pastry bag.

Truffles:
Pour ganache into a shallow cake pan and set into a refrigerator to chill. When very firm, scoop out small knobs of ganache mix using a melon baller. With meticulously clean hands, roll the ganache mix into rough shaped balls. No need for perfection, they are called truffles because the resemble the knobby delicacy of France's famous black truffle which grows beneath oak trees. Once rolled they can be tossed in bowls of cocoa powder, confectioners sugar, chopped toasted nuts, toasted coconut, or any other dry coating your mind can wrap around. Store chilled, but allow to warm a bit before serving.


Friday, September 24, 2010

10 Best Things To Do With Capers


Sometimes our clients will ask us what to "do" with an ingredient. Often it's an herb or a spice, but several times we've all been asked about capers. What are they? And how do you use them? Well, we're here to tell you.

The caper bush (Capparis spinosa L.) is a perennial winter-deciduous species that bears rounded, fleshy leaves and big white to pinkish-white flowers. A caper is also the pickled immature bud of this plant.


Fresh caper buds are not especially flavorful, but their sharpness increases dramatically after sun-drying and brining in vinegar or packing in salt. The flavor of these processed capers are typically described as pungent and slightly astringent. We're not sure WHAT that means. Suffice it to say... a caper tastes like a caper... A little peppery, a touch of pickle and an earthy vegetal flavor.

The brined variety are the most common type sold in the US. They require a quick rinse and after that are ready to use. If you happen to come across a salted variety (almost always the larger variety of caper and from Italy) they require soaking and rinsing to get rid of the excess salt.

Capers are categorized and sold by their size, defined as follows, with the smallest sizes being the most desirable: Non-pareil (up to 7 mm), surfines (7–8 mm), capucines (8–9 mm), capotes (9–11 mm), fines (11–13 mm), and grusas (14+ mm). Typically you only see the non-pareil or capotes in stores.

If the immature blossoms are not selected to become pickled capers, after blooming they will sometimes turn into caper berries. Caper berries are not used in the same way as capers in recipes. They are more likely to be eaten as a snack or added to savory salads. After hours here at DM Cuisine they have been known to find their way into a Bloody Mary or Vodka Martini.

The Caper Bush is native to the Mediterranean region, so it's not surprising that its most often found in the cuisine of Spain, Italy, Greece and the Levant. Here are some of our favorite uses for capers. Recipes not included this time, but if you're reading this blog you've got Google...

10. Tartar Sauce or Remoulade - This classic mayonnaise based sauce for fried fish and seafood, often contains capers. Typically chopped dill pickles, onion and lemon juice join in the mix.

9. Tonnato Sauce - One of our favorite things, but not widely known outside of Italy. This is a thinly sliced veal roast, served cold, with a smooth sauce of pureed cooked tuna, mayonnaise, capers, lemon and anchovies. Don't knock it until you've tried it

8. Hallaca and Empanada Filling - Here's another dish you may not know, but Empanadas are probably familiar. An Hallaca can be thought of as a large Venezuelan style tamal, wrapped in banana leaves. Inside the corn "masa" is a stew of beef, pork and chicken, seasoned with capers, olives and raisins. Similarly the fillings for empanadas all over South and Central America typically include capers as part of their seasoning. We assume it's a reflection of the Spanish influence.

7. Pasta Salad - A generous spoonful of capers can add a bright note to any pasta salad, especially one featuring fresh or sun dried tomatoes. Capers also seem to have a naturally affinity for many herbs, especially basil, parsley and chives.

6. Smoked Salmon Bagels with Caper Cream Cheese - We always sprinkle a few capers over smoked salmon, and processing them right into the cream cheese for a bagel makes nothing but good sense.

5. Tapenade - Capers add the final fillip here to a French culinary classic. Black Olives, Anchovies, Garlic, Mustard and Olive Oil.

4. Roasted Cauliflower with Roasted Red Peppers and Capers - This has been a DM Cuisine stand by for many years. It's exactly what it says, garnished with some rough chopped flat parsley leaves.

3. Salmon Salad - Should you ever be blessed with some left over grilled or roasted salmon, mix up a fresh salmon salad and remember to add lots of fresh lemon juice, dill and capers.

2. Lemon Caper Sauce - Sometimes this bright light sauce is just what we want over a chicken paillard or simply sauteed piece of fish, say Branzino or Red Snapper. A little stock, splash of white wine, squeeze of lemon and a spoonful of capers, reduced in a saute pan over high heat. Salt, Pepper and a knob of butter swirled in off the heat.

1. Salsa Verde - This we are ready to spoon over anything.... Fish, Chicken, Steak, Grilled Vegetables, Ravioli, Shrimp, and on and on. Throw handfuls of parsley, some lemon zest, toasted pine nuts, garlic, capers, lemon juice and some olive oil in the food processor and whir it into a smooth paste. Drizzle in a tablespoon of water while processing and you'll have the cleanest, greenest, most flavorful deliciousness that's ALMOST too good to share.

Friday, September 17, 2010

Tomatillos


We just love the look of Tomatillos. Bright leaf green with papery husks like lamp shade covers. And the citrus vegetable flavor also makes it one of our favorites.
The only real use for these gems that we've discovered is in salsas, both raw and cooked, but that's enough because with one recipe we can give you three variations with dozens of applications.

Tomatillo Salsa

1 pound tomatillos - husked and washed
1 medium onion - peeled and quartered
1 medium jalapeno
2 large cloves fresh garlic
1/2 cup cilantro leaves - chopped
Salt & Pepper to taste

Option # 1
1/2 ripe avocado - peeled and pitted

Option # 2
1/2 cup cream

Directions
Place tomatillos, onion, garlic and whole jalapeno in a medium saucepan. Fill with water to generously cover the ingredients. Place over high heat, cover and bring to a boil. When boiling, lower heat, remove cover and continue to cook until tomatillos change hue and lose their bright green color. With a slotted spoon remove all items from the pan and discard water. Remove jalapeno and set aside, then put all the vegetables in a blender. Remove stem from jalapeno and cut it in half. Add one half to the blender. Pulse ingredients in the blender until mostly combined. Taste and add salt and pepper. If more jalapeno is desired, chop the remaining half jalapeno and add the desired amount. Continue to pulse the salsa in the blender until finely chopped but not pureed.
Add chopped cilantro right before serving.

This salsa can be chilled and served with fresh white and blue corn tortilla chips, or just used as a fresh salsa with tacos, burritos, tamales, etc.
It can also be served room temperature or warm with grilled vegetables, meats, fish or poultry. Also delicious over scrambled eggs.

Option #1
Add the half avocado halfway through the blending process. Add cilantro as above This adds a delicious richness to the dish. Delicious cold used as any other salsa, or for chips.

Option #2
When salsa is finished, before adding cilantro, pour salsa into a large skillet. Warm and stir in heavy cream. Simmer until sauce reduces slightly. Adjust seasoning. Add cilantro before serving. It's a little more refined version. Serve this warm over chicken breasts, fish fillets, or roast pork loin.

We hope you'll give Tomatillo Salsa a try. It's crazy good and about as easy as it comes.

Friday, September 10, 2010

"Finishing" Oils


Almost every chef has, stashed away, a bottle of their favorite Extra Virgin Olive Oil, to be drizzled sparingly, sprinkled judiciously and occasionally luxuriously spooned over the perfectly grilled bass, fragrant heirloom tomato salad, or maybe crackling crisp pizza, hot from the oven. Some chefs might have some cold pressed walnut oil. Even luckier ones might have some bright green pistachio oil. We at DM Cuisine have all those plus a few House Made Infused Oils, but we can get greedy that way. All of these prized oils are known in the kitchen as finishing oils, meaning they are not used for cooking, not usually heated, and rather used to provide a drizzle of additional unctuousness that "finishes" a dish.

Mediterranean cooks have known about the luxury of fine Extra Virgin Olive Oil (sometimes referred to as EVOO) for years. Each country and region produces oils with distinct flavor profiles ranging from robust, fruity & peppery to full bodied and grassy. Flavor and quality is primarily attributed to variety and freshness of the olives processed. Italy has even established a D.O.C. (Denominazione d'origine protetta) appellation for olive oils in the same manner as they have for wine.

Finishing oils might also be a fresh or toasted nut oil. French cooks love both walnut and hazelnut oils. We often use one or the other when tossing salads, especially in the fall and winter. It's especially delicious to add a handful of the same toasted nuts to double the effect of the oil. A little bit rarer and dearer in price, is pistachio oil. A beautiful liquid jade that has an exotic sexiness that is as surprising as it is enticing. It's delicious over a salad of tender greens, grilled fennel and orange. Just add a squeeze of lemon, coarse sea salt and cracked pepper.

Since the explosion of world cuisines in the 1980's and the growth of California Cuisine, many contemporary kitchens also employ infused oils as part of their Batterie de Cuisine. The process is generally the same for any sturdy herb such as thyme, rosemary, lemongrass. Warm a mildly flavored oil such as pure olive oil, canola or grape seed oil and then add lightly bruised herbs, garlic, spices, citrus peels... whatever flavor agents you wish to infuse into the oil. Maintain at a low temperature (below 150*) for 5- 10 minutes, cool, strain and refrigerate. For tender herbs such as chive, parsley, basil, etc, it's best to blanch and shock the herb leaves in boiling water and then ice water. Gently dry the leaves and then puree in a blender with your oil. This will yield a vivid green oil. You may strain or not, depending on your style.

Here at DM Cuisine, one of out old favorites is a Thyme Garlic Oil.

Thyme Garlic Oil
4 cups Pure Olive Oil (NOT Extra Virgin)
4 ounces fresh thyme sprigs (cleaned, dried and bruised*)
3 large cloves of garlic (cracked)
1 teaspoon whole black peppercorns

Warm oil in a large saucepan. Keep temperature below 150 degrees. Add remaining ingredients and keep on heat for 5 minutes. Remove from heat and cool. Transfer to a container and store, covered in the refrigerator for 5 days. Strain and return to refrigerator. Will keep for several months.


* - to bruise the herbs, run over them with the back of a heavy knife. Just enough to begin to release their oils

Tuesday, September 7, 2010

Farmer's Market Bounty


Sorry we didn't get this to you before Labor Day. Our schedules just got away from us. But we're back, refreshed, re-inspired and as promised ready to provide you with more ideas of how to get the most out of your Farmer's Market Bounty. As the summer begins to wind down, it's easy to greedily stuff your basket with more and more of what seems like the last tomatoes, or peaches or berries. Here are a few of our standbys for using up "garden overflow"

Ratatouille, Capunta, and other Vegetable Stews
The great things about these dishes is that they are equally delicious warm or room temperature. Another big bonus it that you can vary the ingredients to work with what's on hand. The method is pretty much the same ... Cut up the vegetables in equal sizes. Anywhere from 2 inch to 1/2 inch, depending on whether you want a heartier stew or more of a condiment.
Saute or roast each vegetable separately with some olive oil, salt & pepper. Once everything is cooked combine, and add some tomato sauce or peeled, chopped tomato and any herbs you want. Cook together over high heat until the tomato breaks down a little and serve. Or chill and serve room temperature or cold.
Ratatouille is classically eggplant, zucchini, onion, tomato and basil.
Capunata is mostly eggplant, with celery, onion, zucchini, peppers, olives and raisins.
Any other combinations can be inspired as well. Maybe Butternut Squash, Apples, Peppers and Onions? or Fennel, Zucchini, Shallots and Black Olive. Whatever is left ...

Grilled Vegetable Salad
Always take the time to cook some extra veggies when you are grilling or roasting vegetables for dinner. You are minutes away from a great salad of chopped vegetables. Toss with Olive Oil and Herb Vinegar or Balsamic Vinegar, maybe some Sun Dried Tomato, or Pine Nuts, Olives, or Almonds, and a healthy handful of fresh herbs. Brand new dish from yesterday's leftovers.

Salsa Cruda
Just a rough chop of extra tomatoes and you are half way to a delicious salsa. Chilies, Scallions, Peaches, Red-Green-Yellow Peppers, Apples, Berries, or even some of those leftover grilled veggies.... Salt, Pepper and maybe a squeeze of Lime.

Quick Pickles
Most firm veggies take well to a quick pickle. Some, like cucumbers, carrots or radishes work just great raw; others like green beans, fennel, mushrooms, asparagus or cauliflower will be more successful if blanched first.
All we do is combine some good vinegar and water (about 50% of the amount of vinegar), with garlic, herbs, whole peppercorns, salt and a few spoons of sugar (to taste). Bring to a simmer and pour over the vegetables in a non reactive bowl. Set a plate on top to keep the vegetables submerged and allow to cool. Refrigerate for a day or so and they are good to go.

Friday, August 27, 2010

Corn - Summer Gold


When you live in a seasonal climate, and you're a chef, it's all about what fruit or vegetable you are currently infatuated with. When that season is full blown summer, it's hard not to be fickle. One day it's peach crisps and nectarine galettes, the next, heirloom tomatoes have your devoted attention. It only takes one trip to the greenmarket and everything on the table is showered with chopped chives, parsley, basil and tarragon.

And of course, with any summer romance, there's always the chance of being a little too over eager, too ready to indulge, carried away with our senses, which may lead to Farmer's Market Remorse. That moment when you realize you have enough tomatoes for 12, corn for 10, peaches for your entire extended family and it's just you and your partner at home.

So as our local markets begin to swell with the urgency of a ripe fig, DM Cuisine plans to feature a few blogs with the aim of encouraging overflowing tote bags by sharing some inspirations for the extra eggplant, peppers or blueberries you just couldn't resist.

King Corn
Just the image of a bright yellow or ivory kerneled ear of corn screams "Summer" directly in our ears and sets off a stream of sense memories that ricochet from clam bakes, to pots of melted butter, childhood corn picking and shucking, street fair grilled corn stands, park side Bar-B-Q's, and country drives to find "the sweetest" corn available.

Nothing matches corn on the cob for sheer gustatory delight. You must eat it with your hands, you can't eat it properly without getting messy, and its sweet and savory at the same time. However there are so many other ways to enjoy it and we wanted to share some of our favorites

Mexican Style Grilled Corn
For this you will need cleaned whole or half ears of corn, cut lime wedges, grated cotija (or parmesan) cheese, mayonnaise, and ancho chile powder (or cayenne or chile powder) Grill the corn over medium to low heat, turning regularly to get a toasted brown color here and there. Remove from heat, brush generously with mayonnaise, squeeze a little lime over it all, dust with cotija cheese and sprinkle to taste with chile powder. Madre de Dios estupenda!

Pumped Up Corn Bread
Making some cornbread or corn muffins? Add fresh corn cut from the cob right into your recipe when you add the wet ingredients. Maybe 1/2 - 1 cup. And then some chopped jalapeno or red pepper, and then some cheddar cheese, or ... well you get the idea. The corn is great in either a sweet or savory cornbread!

Cuban Corn and Black Bean Salad
This one couldn't be easier. Clean some ears of corn and boil them as you would for corn on the cob. When cooked, let cool then cut the kernels from the cob. We find a serrated or bread knife works best for this. Drain and rinse a can or black beans. It pays to buy organic here. It really is a better product typically. Chop some red pepper and red onion finely and toss everything together. Season with plenty of chopped cilantro, salt and pepper, olive or corn oil and a splash of apple cider vinegar. Maybe a teaspoon or two of sugar IF it needs it.

Succotash
What is it about the word Succotash that seems to make most folks lip begin to curl into a grimace? Is it childhood memories of frozen lima beans? Or just a vague uncertainty of what it is exactly? What it is... is any combination of corn and beans. We love it! And often enjoy a stir fry of corn, green beans and a little pancetta. Or sauteed corn, fava beans and red onion. Maybe sauteed corn, edamame, scallion and garlic. Looking for indulgence? Corn, Fresh Cranberry Beans, Leeks and Truffled Butter. Richer? Corn, Caramelized Onions, Fava Beans, Haricots Verts, Shallots, Fresh Tomato, Basil and a spoonful of Creme Fraiche, sauteed and simmered till lightly thickened..... those lips are starting to curl into a smile now.

Thursday, August 19, 2010

Summer Ratafias - Fruit Infused Wine & Brandy


Mid August. And for those of us in the Northeast this means we are hip high in delicious local vegetables, tomatoes, stone fruits, cherries, berries and such. It brings on a sort of giddiness in some chefs, and sadly for catering chefs, a melancholy because it coincides with our slowest season in the year.
However in the spirit of Lemons into Lemonade, the slowness of the season allows us all the time we can use to turn to canning and preserving in response to the lushness of ripening fruits and vegetables. Tart Cherry Lime Preserves, Rhubarb Ginger Jam, Strawberry Merlot Preserves, Plum Chutney, Red Chile & Serrano Hot Sauce, all had secured a place in our pantry by the beginning of August. That's why it's been fun to find a new medium with which to preserve the brightness and lusciousness of what the Farmer's markets have been treating us to.

A few years back, we clipped a recipe from the NY Times for Rataifas. In the article they described an easily made wine cordial infused with whatever fruit or vegetables took your fancy at any particular moment. In doing a touch more research, we've discovered that the term

rat·a·fi·a – noun
a sweet liqueur made from wine or grape juice combined with brandy or other spirits and often flavored with almonds, fruit, or fruit kernels.


is very old, and seems to have been developed in 1690-1700, somewhere between Spain and Italy. Sounds like France to us. And most other recipes we saw, opted for brandy or marc in lieu of the wine. We're sure the more potent brandy versions are delectable, but given the heat and humidity that accompanies our buckets of garden bounty, we're feeling an iced glass of peach verbena ratafia a whole lot more.

The assortment of Ratafias you can produce are only limited by your market and your imagination. Any ripe and flavorful fruit, vegetable or herb is fair game for infusion. Our first versions have stayed played it a little close to the apron because the flavors seemed so irresistible: Peach, Strawberry, Blueberry, Apricot, often touched up with a few springs of Basil, Lemon Thyme or Tarragon. Our next endeavors are likely to step it up a bit. We've discussed a Tomato/Jalapeno/Cilantro combo, and perhaps a Melon/Lavender or Nectarine/Ginger. Truly the most difficult part is waiting the 3 weeks to check out the results of your flavor laboratory.

Ratafia
adapted from T'afia Restaurant - Chef Monica Pope

1 cup ripe fruit, herbs or vegetables (fruits/vegetables cut up, herbs crushed)
1/4 cup sugar
1/4 vanilla bean - sliced lengthwise (optional)
1/4 cup vodka (to prevent further fermentation)
1 bottle (750ml) white or red wine

Place all ingredients in a large glass jar and stir to dissolve the sugar. Cover tightly and refrigerate for 3 to 4 weeks. Strain through a fine sieve lined with cheesecloth, pressing down gently on the solids. Discard the fruit. Pour infused wine carefully into clean wine bottles and cork tightly. Storre in refrigerator. Should keep for several months.


We encourage you to give these a whirl and get back to us with your combinations and adaptations. If you want to lighten up your libation, these ratafias make great spritzers with a splash of seltzer.

Friday, August 13, 2010

Watercress, Watermelon and Feta

One of our new favorite things is the Hydroponic Watercress from California that we found at our local Whole Foods. Granted, we'd be even happier if someone locally could start growing it, reducing our carbon footprint, but until that happens we'll balance our greenness with the environmental friendliness of hydroponics.

Tender, enormous leaves, with much thinner and delicate stems, this watercress combines all the pepper punch of traditional watercress with the light texture of mache. Well, yeeeaaahhh! What's not to love?

So far it has found it's way onto sandwiches, wilted into white beans, "pesto-ed" with almonds and dressed in numerous salads. As we wilt through the record breaking heat of August, this combination of juicy watermelon and salty feta seems to be comfortably setting into the #1 spot of cooling foods. We know we've mentioned this salad before, but we wanted to give you an actual recipe this time.

Watercress, Watermelon and Feta Salad with Pickled Red Onions

1 medium red onion - halved and sliced as thinly as possible
3/4 cup red wine vinegar
1/4 cup water
2 Tablespoon granulated sugar
1/2 teaspoon salt

2 bunches watercress - trimmed
3 cups watermelon - seeded or seedless - trimmed and diced into 3/4" cubes
1 1/2 cups feta (French if available) - diced into 1/2" - 3/4" cubes
3 Tablespoons Extra Virgin Olive oil
Sea Salt & Freshly Ground Pepper

For the Onions:
Combine vinegar, water, sugar and salt. Stir to dissolve sugar and salt. Bring to a simmer and add sliced onions. Stir. Remove from heat and set aside to cool. Transfer to a glass or plastic container and chill. Will keep refrigerated for 2 weeks to a month.

For the Salad:
Make sure the watercress, watermelon and feta are well chilled. Place watercress, watermelon and feta into a large mixing bowl. Drizzle with olive oil. Season with salt and pepper. Add some of the pickled onions with their liquid (to taste) onto the salad and toss all ingredients gently.
Serve immediately.

Thursday, August 5, 2010

Beet Hummus


We've been taking advantage of a few days off from events to try out new ideas and recipes. Just for the look alone, this Beet Hummus went to the top of our list. Add on that it's lighter than typical bean versions and it received a collective red stained thumbs up.


Here's our version of a recipe we found on Simplyrecipes.com


Beet Hummus


Ingredients
1/2 pound beets (about 4 medium sized beets)
3 Tbsp tahini sesame seed paste
1/4 cup fresh lemon juice
1 small clove garlic, chopped
1 Tbsp ground cumin
2 tsp lemon zest (zest from approx. 1 - 2 lemons)
Generous pinch of sea salt or Kosher salt
Fresh ground pepper to taste

To cook the beets, preheat oven to 375°F. Cut off any tops, scrub the roots clean, wrap them together in aluminum foil and set in a roasting pan. Cook until easily penetrated with a knife or fork. This can take anywhere from 40 minutes to over an hour depending on the size of your beets.

Method
Place all ingredients in a food processor (or blender) and pulse until smooth. Taste and adjust seasonings and ingredients as desired.
Chill and store in the refrigerator for up to 3 days or freeze for longer storage.
Eat with baguette toasts, pita chips, or with crudites vegetables, or on a crostini with goat cheese and shaved mint.

Thursday, July 29, 2010

Herb Garden


Professional chefs often find themselves being quizzed for culinary tips and hints from home cooks. One topic that seems to come up with regularity is herbs. How do I know which one to use? How do I know how much to use? If I don't have fresh can I substitute dried...... and so on. Here's some quick notes and references:

What's the difference between herbs and spices?
The essential difference between an herb and a spice is where it is obtained from on a plant. Herbs usually come from the flower or leafy part of a plant. Spices can be obtained from seeds, fruits, roots, bark, or some other vegetative substance.

Can I substitute dried herbs for fresh?
If the recipe is going to be cooked or if the herb will be exposed to moisture for a stretch of time, then sure, if you have to. The general rule of thumb is 1 to 3, meaning for example 1 teaspoon dried herb to replace 3 teaspoons (or 1 Tablespoon) fresh herb. Remember that dried herbs and spices lose strength over time, so use your own judgement.

Also, some herbs tend to dry more successfully than others. Dried Basil and Oregano can be used pretty successfully is tomato sauces & soups. Dried Bay Leaf is sometimes preferred to fresh. Dried Dill can also be reconstituted in cream sauces or dips with success. However Dried Parsley and Rosemary are pretty much useless. Parsley being so insipid as to be flavorless, Rosemary so harsh that the smallest pinch can overwhelm whatever it is in.


How do I know which one to use?
Well, experience is the best teacher here, but there are some guidelines. Herbs can be classified as either tender or hard leaf . Tender being parsley, basil, tarragon, chive, oregano, marjoram, thyme, etc. Hard leaf herbs are rosemary, bay leaf, lemongrass, etc.
In general, tender leaf herbs should be used either raw or added during the last few minutes of cooking. Hard leaf herbs need longer cooking to really release their flavors. In some cases, like bay leaf, lime leaf and lemongrass, the herbs are removed before serving and not consumed.
Here are some classic combinations:
Basil - Tomato, Eggplant, Zucchini, Feta, Pasta, Vinaigrettes, Corn, Roasted Peppers
Chives - Eggs, Chicken, Fish, Cream, Asparagus, Shellfish, Vegetable Salads
Cilantro - Latin and Southwest Asian Cuisines, Tomatoes, Beans, Corn
Dill - Eggs, Poultry, Cream, Beets, Shellfish, Vegetable Salads
Marjoram - Fish, Carrots, Parsnips, Winter Squash, Roasted Vegetables
Mint - Tomato, Feta, Sweets, Lamb, Fruits
Oregano - Tomatoes, Beans, Zucchini, Vinaigrettes, Lamb
Rosemary - Roasted or Grilled Vegetables, Winter Squash, Red Meats, Game, Bread
Sage - Poultry, Veal, Beans
Tarragon - Tomato, Soft Cheeses, Eggs, Asparagus, Beef, Chicken, Fish, Vinaigrettes, Shellfish
Thyme - Red Meats, Poultry, Beans, Onions, Beans

Without a doubt, the best way to learn about using herbs is to just experiment with them. Read recipes, read menus, and set up an herb garden.
If you are an urban chef like us, it's very easy to set up a window garden as long as you get 5 or more hours of sun. We use discarded ceramic tea pots we find tossed out or at stoop sales. Just put in 1/2 " of gravel or broken pottery in the bottom of the tea pot, fill with potting soil and sow seeds or a small plant and remember to water it. Thyme, Rosemary, Oregano and Marjoram can grow year round if well tended. Basil, Parsley, Cilantro and Chives will die after harvesting and should be replanted to maintain a steady supply .

Wednesday, July 21, 2010

Mise en Place


Every trade has a few tricks, and cooking crews are no different. In our kitchen, any idea from clever to brilliant is welcomed, if it gets the job done better or faster. Luckily, our crew is culled from all over Manhattan and in fact all over the world from Ecuador to Korea. We are never short of opinions or ideas about proper technique, and rarely unanimous in our opinions.

One area of seeming universal approval is in the use of what is known as Mise en Place (pronounced "meez on ploss"). Simply put, it is the practice of pre-measuring and organizing all ingredients for a recipe before moving onto the procedure. On a restaurant “line”; which is what the battery of cooks who prepare the meals is known as, your “meez” is your life line.

A mise en place is your defense against the moment when the onions begin to burn because you are busy opening the bottle of wine to deglaze the pan with, or when the egg whites whip past soft peaks as you struggle to measure the ¼ cup of sugar.

The effectiveness of the mise en place becomes more and more obvious as a recipe becomes more involved, in a soup or a chock full chunk cookie recipe for example. Not only will cooking become less stressful, but your recipe will become one step closer to perfection once you cancel the possibility of that last second spring to find the baking powder or chopped garlic the recipe is calling for.

And don't worry about needing a cupboard full of bowls. Empty plastic take out containers, yogurt cups or sour cream containers work great. Also yard sales are a great place to pick up cheap stackable plastic or Pyrex cups that are just the kind of thing you'll want.


Friday, July 9, 2010

Croquembouche!


Whenever we serve one of these towering confections, there's always three questions,
After the ooohs, ahhhs and flashbulbs have quieted down of course.

1. Crokem...what??

2. What is it exactly???

3. How do we eat it?????

All three queries easily answered....

First - It's a Croquembouche (kroh-kuhm-boosh) French as you might have guessed, and it means "crunch in your mouth", more or less.

Second - It is a traditional pastry concoction, or as the French might say, a "pièce montée" - oooohh la la, composed of miniature cream puffs (profiteroles), filled with pastry cream (crème patisserie), and held together by hard crack caramel (providing the "croque) in a towering pyramid cone. Typically a croquembouche is decorated with sugared almonds, caramel threads, macarons or in the case of Chef Daniel... 14 karat gold dust.

The croquembouche a long been a fixture at French weddings, christenings or any event deemed celebratory enough for such a special treat. It is believed to have first been made by the legendary pastry chef Antoine Careme (1783 - 1833) who was known for his monumental dessert creations. The individual puffs are made from pâte à choux (choux meaning cabbage) named so because the baked puffs are said to resemble tiny heads of cabbage. Choux paste, as it is known in the American kitchen, actually dates back even further than the croquembouche. It was introduced to France by the Italian chefs who accompanied Catherine de Medici when she wed the future King Henry II.

After the puffs are baked and dried, they are filled with the pastry cream right before assembling the tower. Traditionally the puffs are filled with a vanilla pastry cream, but Chef Daniel usually gilds that particular fleur-di-lys by adding chocolate and coffee flavors to the mix.
They are then dipped VERY CAREFULLY into a molten pot of caramel, literally burnt sugar, and quickly assembled into the traditional pyramid of treats. Each puff must be held in place for a few seconds as the caramel cools and sets to its classic "crack". Every level of puffs set back slightly as the cone rises before the chef.

A small croquembouche, say 18 inches high, will use about 120 filled profiteroles. Most of the croquembouches Chef Daniel makes tend more to the 2 - 3 foot variety. There are rumors still circulating in the kitchen of a 6 foot version from years past.

Lastly - The eating! We've read accounts of a croquembouche being "carved" by sword in France. For those lacking that particular brand of panache, we usually find that a sturdy knife and cake server provides enough heft to break through the caramel crust and serve 2 or 3 puffs to each guest. When it's time for "seconds" most guests are curious enough to want to have a go at serving themselves.

Offer pitchers of bittersweet chocolate sauce, caramel sauce with sea salt, whipped cream and fresh strawberries for the hedonistic pleasure of it all.

Thursday, July 1, 2010

Picnic Possibilities

July has always been ripe with potential for revolution and liberation. Be it 1776 Philadelphia or the storming of the Bastille in 1789 Paris, it’s time to throw off some chains and march freely. For us that means unlocking all tethers from the kitchen and heading outside to catch a breeze and some sun.

Leave the grill behind and pack a bountiful picnic basket. Keep your cool and forget about serving hot food. We like to take our inspirations from cuisines that are naturals when it comes to dining al fresco.

French Country Picnic

Classic Crudite of Haricots Verts, Endive, Fingerling Potatoes, Radish & Tomatoes
Lemon Aioli, Black Olive Tapenade & Fleur de Sel

Open Faced Tartines (Small French Sandwiches)
Brie and Green Apple with Honey Dijon, Fromage Blanc with Sautéed Greens & Roast Red

Peppers, Pâté de Campagne with Caramelized Onions & Cornichon, Grilled Chicken with

Leeks & Goat Cheese

Pissaladiere – Puff Pastry “Pizza” topped with Caramelized Onion, Anchovies, Herbs and Olives

Fresh & Smoked Salmon Rilettes with Toast Points

Double Crème Brie, Cave Aged Comte & Pots of Whipped Herbed Chevre
Sliced Walnut Bread, Crisps & Baguette Toasts

Strawberries & Grapes
Palmiers and Macarons

To Drink – Raspberry Lemonade, Dry Rosé, Hard Cider, French Chardonnay, Belgian Fruit Brewed Ales

Italian Rustic Picnic

Grilled Asparagus, Fennel, Peppers, Zucchini & Yellow Squash
Extra Virgin Olive Oil and Balsamico

Proscuitto di Parma, Soppresata, Genoa Salami & Bresaola Cured Beef
Piave Vecchio & Parmesan Reggiano Cheeses

Grilled Shrimp and Calamari with White Beans, Lemon, Pepperoncini and Parsley

Heirloom Tomatoes, Cilegini Mozzarella, Olives and Basil

Pizza Bianca Flatbread and Crostini
Fava Bean & Arugula Dip; White Bean Puree with Lemon, Oregano & Roasted Garlic; Fresh

Ricotta, Caramelized Onions & Pink Peppercorns

Ripe Figs and Cherries
Pignoli Cookies & Biscotti

To Drink – San Pelligrino Aranciata and Limonata (Italian Dry Sparkling Fruit Drinks), Prosecco, Pinot Grigio, Pieroni Beer

Pan Asian Picnic

Vietnamese Bahn Mi Sandwiches
Classically Pork, Pate, Pickled Carrots & Daikon, Cilantro, Baguette
But feel free to improvise with grilled chicken, ham, meatballs, etc

Shrimp and Avocado Summer Rolls
Rice Paper, Asian Veggies, Letuce, Mint, Sambal & Ginger

Soy Seared Salmon on Buckwheat Soba Noodle Salad
Shiitake Mushrooms, Ginger, Soy, Scallions, Sprouts & Sesame

Tofu Salad with Sweet Chile Sauce, Peanuts and Thai Basil

Colorful Shrimp Chips
Spicy Peanut Sauce
Teriyaki Eggplant Dip

Pineapple and Kiwi Skewers
Rice Krispie Treats and Chewy Ginger Cookies

To Drink - Iced Ginger and Lemongrass Green Tea, Chilled Gerwertztraminier, Litchi Reisling Cooler, Sapporo Beer

And don’t forget:

Plenty of blankets or tablecloths – Bring enough so that everyone has plenty of room to stretch out.

“Blue Ice Packs” – No one wants to pay a price for the picnic tomorrow. Keep cold foods chilled until you spread the spread; and then repack on the ice when the buffet is closed. Anyone can always dig out some seconds if they get a craving.

Bug Spray – Anyone in your party who is especially attractive to flying critters will be miserable without this.

Sun Screen – It’s easy to burn when you’re distracted playing games

Cork Screw – Though there’s so many great screw top wines available now, you may not need this any more.

Friday, June 25, 2010

Some Entertaining Ideas

Summer is officially here and the Heat Has Hit with typical no holds barred enthusiasm. We're craving not much more than a cool pool, frosty libations and fabulous friends! Trouble is, those fabulous friends tend to arrive famished and expecting a tableful of DM Cuisine's finest.

Here are a few of our heat free kitchen ideas for the summer:

Watermelon, Feta and Watercress Salad

Place a few handfuls of clean, dry watercress in a bowl. Add 1 cup or more of cubed seedless watermelon, and about 1/2 cup of diced feta cheese - we prefer French feta. Season with a bit of sea salt, fresh ground black pepper and several generous splashes of Extra Virgin Olive Oil. Gently toss the salad and then sprinkle with a good red wine vinegar. Toss again and serve

Pan Bagnat

Let your inspirations (or refrigerator leftovers) dictate what goes in your own version. What's important is a good baguette, slightly hollowed out and filled with deliciousness.

A classic Pan Bagnat (translated as "wet bread" in French Provencal dialect) is essentially a Tuna Salad Nicoise in a baguette.

Slice a roll or a baguette lengthwise and tear out some of the interior bread filling. Drizzle baguette with a simple olive oil vinaigrette. Layer top quality canned tuna, sliced hard cooked eggs, ripe tomato slices, pitted black olives, raw red peppers, grilled red onion .... feel free to adlib, extemporize, improvize and improve.

And here's the key, once you've finished, wrap it tightly in plastic wrap and tuck it in the refrigerator for a few hours, some people actually even weight it down a bit.

When ready to serve, unwrap, slice and enjoy.


Root Vegetable Chips with Buttermilk Chive Dip

There are so many top quality, well made chips available, that we love to put out a big bowl of them with this light buttermilk dip. Don't leave the chips out too long on a humid day or you'll lose the crunch.

Buttermilk Chive Cream

1 cup sour cream
1/2 cup buttermilk
3 Tablespoons chives, minced
1/2 teaspoon black pepper, freshly ground
2 teaspoons salt
1/4 teaspoon Tabasco brand hot sauce

Stir together ingredients until well combined. Chill and serve with chips.

Finish off with some local berries and whipped cream you brought back from the farmers market, or ice cream sandwiches made with your favorite bakery's oatmeal raisin cookies, or just a big bowl of Bing cherries.

For cocktail treats, think about our featured specialty cocktail The Highline LemonLime.

You can find the recipe in the Chef's Corner at dmcuisine.com